It’s been 2 years now since I’ve stopped eating mutton and chicken and when I crave for biryani, it’s usually fish. But this time I wanted something different; so I tried out egg biryani for a change.
For me when it comes to biryani, it’s all in the gravy. The gravy has to be thick and tangy and I’m finally getting the correct consistency too! This particular masala that I have prepared for the egg biryani can also be used if you’re cooking mutton, chicken or fish, though I have not tried it. But hubby says it should be fine.
I now have plans to try out more biryani recipes with paneer and channa. So do stay locked and meanwhile, I truly hope you will give this recipe a try and am sure you will like it!
Ingredients
- Eggs – 6, hardboiled and make slits on each egg
- Onion –1 large, sliced
- Ginger garlic paste – 1 tsp
- Yogurt – 1/2 cup
- Turmeric powder – 1/2 tsp
- Chilli powder – 2 tbsp
- Biryani masala powder – 2 tbsp
- Salt
- Oil & ghee
Paste
- Onion – 1 large
- Tomato – 1 large
- Green chilli – 4
- Cashew nuts – 15
- Mint leaves – about 10 leaves
- Coriander leaves – small bunch
Rice
- Basmati rice – 2 cups
- Water
- Kesari colouring – 1/4 teaspoon and mix with little water
- Clove – 4 pieces
- Cardamom sticks – 2
- Bay leaves – 2
- Ghee
Garnishing
- Onion – 1 large sliced (for deep frying)
- Mint leaves – small bunch
- Coriander leaves – small bunch
- Cashew nuts – 20 piece
- Raisins – 20 pieces
- Ghee
Method
- Soak the basmati rice in water for half an hour. Wash and keep it aside to dry thoroughly.
- Boil the eggs in water till fully cooked. When it has cooled slightly, remove the shell and make slits on each eggs.
- Add all the ingredients to make a paste into a blender. Add enough water and grind into a smooth paste and keep it aside.
- In a wok, add a little ghee and fry the sliced onions till dark brown. Remove and keep it aside.
- Next add the cashew nuts and fry till golden brown. Remove and keep it aside and finally fry the raisins and remove and keep it aside. Keep the fried onions, cashew nuts and raisins aside for garnishing together with the coriander leaves and mint leaves.
- In the same wok, add more oil if needed, and add a pinch of turmeric powder and chilli powder. Add the eggs and fry for about 3-4 mins. Remove and keep it aside.
- Next saute the sliced onions till they turn slightly brown.
- Then add the ginger garlic paste and saute for couple of mins.
- Next add the onion, tomato, green chilli, coriander leaves, mint leaves and cashew nut paste and fry till the paste thickens. This may take 5-10 mins.
- Once the paste thickens, add the turmeric powder, chilli powder and biryani masala powder and stir well for couple of mins.
- Whisk the yogurt well and add to the paste and stir well.
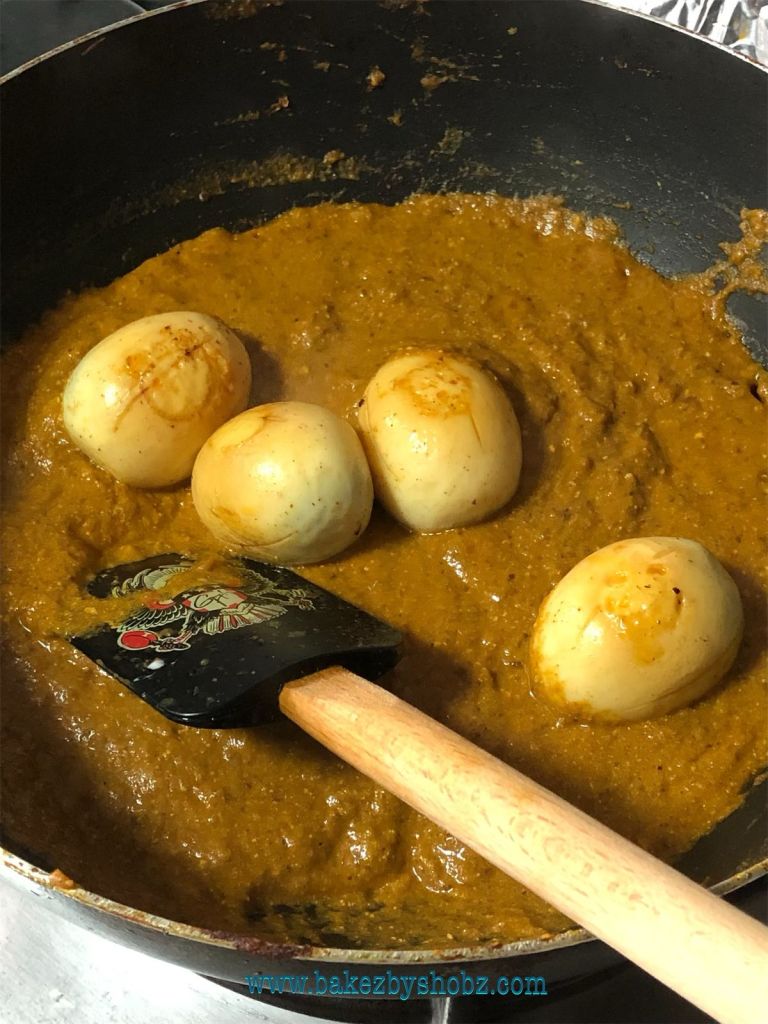
- Add the eggs, salt and half a cup of water and mix well.
- Cover and tell it cook for about 5 mins.
- The gravy would be thick now. Add little water if required and adjust the taste accordingly.
- Let it simmer for couple of minutes covered and then remove from the stove.
- In a separate wok, add a little ghee and fry the cloves, cardamom sticks and bay leaves. Add rice and saute for a minute. Add a little bit of salt and enough water and let the rice cook 3/4 way and drain off the water.
- Mix the kesari powder with very little water and sprinkle over the rice and using a fork gently mix the colouring all over the rice. Don’t add too much as you don’t want to get all the rice orange in colour. Leave some rice to be white as the contrast would look very nice.
- Prepare the pot where the layering is to be done by rubbing a little ghee on the bottom and sides of the pot so that it does not stick.
- Layer the bottom of the vessel with rice and add the eggs with gravy. Be liberal with the gravy.
- Next add a little coriander leaves, mint leaves, fried onion, cashew nuts and raisins. You may place them in any order you like.
- Add rice on top of the eggs and repeat the garnishing process.
- Cover the pot and keep it on the stove over very low flame for about 15 mins. This is to give it the dum effect.
- Serve hot with raita, pappadum and pickle.
- Enjoy!
If you make this recipe, I’d love to see your pics on Instagram and do tag @bakezbyshobz and hashtag it #bakezbyshobz